Creating a Rails project using Dev Containers
A long time ago, I wrote a post about not using Docker to run your Rails application: https://kdiogenes.github.io/posts/dev-dont-put-rails-on-the-whale/. Following this approach I wrote a post recently about using a project-specific PostgreSQL without exposing ports: https://kdiogenes.github.io/posts/using-docker-compose-to-create-project-specific-postgres-for-rails-without-exposing-database-port/. After publishing it, I remembered that some services don’t use sockets for communication, ElasticSearch for example, so this solution wouldn’t work for them. So you have two paths in this scenario:
- Put Rails on the whale, so you can connect to other docker services.
- Expose the service port to the host machine.
Since I don’t want to expose the service port to the host machine, I decided to give a try to the first option, but now using Dev Containers. I decided to try it after reading Rafael França, a Rails core team member, saying somewhere that he uses it to develop Rails applications. Since a great developer like him uses it, I think that the experience with it is by far better than the one I tried a long time ago.
So in the last weekend I tinkered with it for a while and the experience was fantastic. I was able to run a Rails application, run the tests, debug it and also use bundle open. Using it, you can even create your projects without installing any programming language, runtime managers or projects dependencies on your OS. You only need to have Docker and VSCode or IntelliJ with the Dev Containers extension. I only used VSCode, so I can’t say anything for sure about how this works on IntelliJ.
Nice, now let’s see how we can create a Rails project using Ruby 3.3.0 and PostgreSQL 16.2 using Dev Containers. So, create a folder for your project and open it in VSCode:
1
2
3
mkdir my-awesome-rails-project
cd my-awesome-rails-project
code .
Now you can press Ctrl+Shift+P and type Dev Containers: Add Dev Container Configuration Files..., select Add configuration to workspace so the files for the Dev Container are created on the my-awesome-rails-project folder. There are plenty of templates to choose from, but I will use the Ruby on Rails & Postgres. After selecting it, you must select the Ruby version (I selected 3.3-bullseye, the default one as of this writing). You can also select features to install, for this moment I will not select any of them and just click Ok.
This will create two folders on your project: .devcontainer and .github. For this post I will just ignore the .github folder. The .devcontainer folder will contain four files: create-db-user.sql, devcontainer.json, docker-compose.yml and Dockerfile. At this moment, VSCode will detect the presence of the devcontainer.json and offer the option to reopen the project in container, click on the button and wait for the magic to happen.
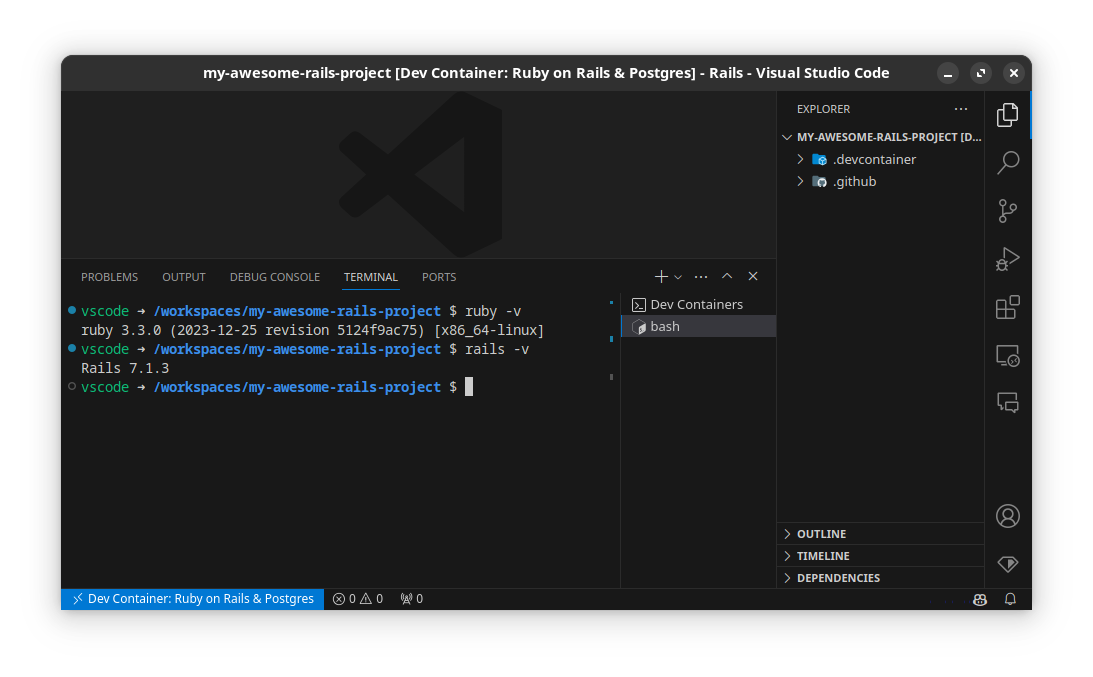
After the container is up and running, you will see an image like the one below:
Notice the blue bar in the bottom left corner of the window, it shows the name of the container you are connected to. Now you can open a terminal and run the following commands:
1
2
3
4
ruby -v
# => ruby 3.3.0 (2023-12-25 revision 5124f9ac75) [x86_64-linux]
rails -v
# => Rails 7.1.3
Awesome, we have Ruby 3.3 and Rails 7! Now let’s create our Rails project:
1
rails new . --database=postgresql
Now we just need to make some changes to the config/database.yml, so we can create and connect to our application database. Update the default section of config/database.yml file to:
1
2
3
4
5
6
7
8
9
default: &default
  adapter: postgresql
  encoding: unicode
  # For details on connection pooling, see Rails configuration guide
  # https://guides.rubyonrails.org/configuring.html#database-pooling
  pool: <%= ENV.fetch("RAILS_MAX_THREADS") { 5 } %>
  host: localhost
  username: postgres
  password: postgres
And we are done! Just create the database and start your Rails server:
1
2
bin/rails db:create
bin/rails s
When the server is started, VSCode detects it and automatically forwards the port to your host machine. You can access your application on http://localhost:3000. You can also run your tests, debug your application and use EDITOR=code bundle open pg to open the source code of a gem. It’s really like as if you are using VSCode with code and tools installed on your local OS. But keep in mind that it’s because VSCode is doing all the heavy lifting to make all this look seamless.
This only scratches what you can do with Dev Containers, you can add more services to the docker-compose.yml file, you can add more tools to the Dockerfile and you can also make tweaks to your containers with the help of the devcontainer.json file. You also saw that we can use this for tons of uses cases beyond Ruby on Rails.
The Dev Container site has a lot of documentation and examples, so you can learn more about it and understand better how it works. Also, the tooling is very open, for the example used in this post, the Ruby on Rails & Postgres is a template that uses a Ruby image slightly modified from the official Ruby image. A cool thing about this Ruby image is that it uses Dev Containers features to add the vscode user to the image, so the files you created on the container are owned by a user with UID 1000, probably the same UID you have on your host machine.
It’s also interesting to note that we don’t need much to add Dev Container to an existing project, just add the .devcontainer/devcontainer.json and configure according to your development needs.
Happy hacking!
